Welcome to Draffen Sheep Handler
Full Crutch, Wig, Bung Hole, Dag, Foot Pare, Drench, Vaccinate.
The Draffen Sheep Handler comes standard with Leg Holder and digital counter, with the option for Wheels and Drawbar. Also available is Flexi Drive, Auto Switch, Motor Stand and Lead up Panels. Check item description for more details.
Help Center
All prices listed on this website include GST.
Privacy Policy https://www.termsfeed.com/live/fefa0ca7-4d50-4dfd-8f4c-9758fe01c692
Looking to buy a Sheep Handler?
If you are interested in buying a new Sheep Handler or accessories, please send me an email at draffenhandler@gmail.com
Or you can message or call Leigh Draffen on 0408 336 845.
After some spare parts
We have all your spare parts available.
Most parts listed below with prices.
How to Pay?
EFT.
Invoice emailed to you will include banking details.
Or Cheque on pick up, if you still have a cheque book.
Draffen Sheep Handler
We can organise transport but do prefer customer pickup.

Draffen Sheep Handler
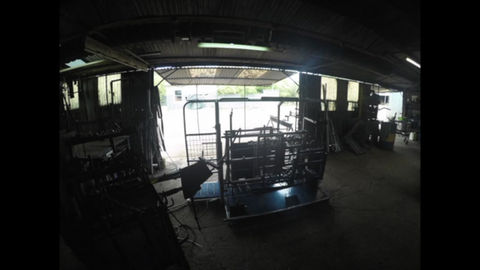
Construction, time Lapse, GoPro
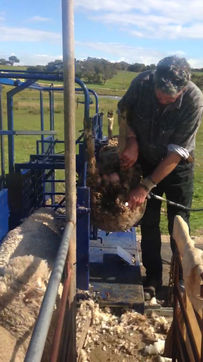
Full Crutching Ewes
Drench, Vaccinate, Full Crutch, 4 weeks before Lambing.
4 year old Corriedale ewes. Heatherlie 29/6/2020.

2017, Albany, W.A
Crutching through a Left Handed Draffen Sheep Handler
Bung Hole / Dagging
Crutching ewes with 4 months wool, September 2012.
3 Handlers set up in portable Crutching shed

Contact Us
Draffen Sheep Handler
Main Oil Points
Oil is better than Grease
At least once a day, depending on operating conditions, more often.

Crush Slides

Ratchet Trip
Foot Dog

Front Gate Catch

Draffen Sheep Handler Features
History
Designed and manufactured by Stirling Draffen, who has used sheep handling equipment since the 70's. Built out of necessity to get the job done easier and efficiently. Currently running 35,000 sheep.
The Draffen Sheep Handler has been in production since 1990, built to the highest of standards achieving outstanding efficiency, productivity, and ease of operation.
Over 1,400 machines sold.
Innovative
- Excellent sheep flow
- Full crutch, wig, ring, foot pare, etc.
- Fully adjustable for height, width and length.
- Secure holding of sheep
- Low operating costs, no need for hi-tec components, motors or hydraulics.
- Fully automatic gates
- Automatic sheep counter
- Drafting gate
Productivity
When crutching, productivity is influenced by the skill and speed of the operator with the hand piece.
The designers aim is to produce the most convenient, efficient and durable machine.
Operator safety is important.
Replacing Ratchet Shaft
Ratchet Shafts are case hardened. Over a period of time these shafts will wear and need to be replaced. Welding is required to replace these shafts.
Cut out old Shaft

Step one
Cut through Ratchet Shaft close to the Ratchet lever '25 x 6mm flat. This can be done from either side.
Remove old Shaft

Step 2
Grind the rest of the weld to remove the rest of the shaft
Fit New Shaft

Step 3
Place new Shaft in. Will need to be done from the far side (where the sheep stand).
Shaft sticks out 6mm through each washer.
Weld one washer on first, position to the inside.
Use the thickness of an aluminium can as a spacer between the ratchet lever and Crush centre.
With the Ratchet trip/Lever in the home position, rotate the shaft to the correct position. Weld. Weld on end washer.
Ratchet Blades
Held in place with elastrator rings.
Up to 6 wearing spots, 3 each side.
If you are using new blades on an old machine which has angled teeth, you will need to grind the top edge of the blade to fit in better.


Ratchet Blade the How and Where
The Ratchet Blades have been made from spring steel and been heat treated for durability. Held in place with elastrator rings. Rings will perish and stretch over time and need replacing.
Buying 2nd hand.
Most Sheep Handlers sold at clearing sales may not have been used for some time. After 6 to 12 months you may find that the rings have perished and Ratchet blades missing.
You should find spare blades located on the front upright next to spanner.

Digital Counter Set Up
How to install the Digital counter

1. Weld on 12mm Washer
This holds the 12mm Magnet

2. Weld on 10NB Ferrule
10 to 12mm from Upright edge
Use 12mm rod to align ferrule with Washer.
3. Weld on 50mm Angle
Sensor Guard

4. Counter Frame
Weld on to Frame.

5. Wire in Counter
Fit sensor in the 10NB pipe ferrule, start with sensor flush with edge of upright.
Insert sensor wire through the counter frame.
Attach wires to counter, ensure you wire to the ‘count’ side, brown +.
Push Counter into place in the frame
Tape sensor wire to upright and pipe frame.
Turn counter on.
Press power button 2 seconds. To reset press reset for 2 seconds.
Test counter by turning Sheep Handler over.
Counter should work with up to a 12mm gap from the magnet to the sensor.
If the counter does not work, try moving the sensor closer, no closer than 5mm.
If the counter still does not work, check the wires are on the ‘count’ and not the ‘reset’.
If you are still having issues call 0408336845.


